
I said it once and I’ll say it far more times than is unnecessary: I HATE PAINTING EYES!!
They never seem to go smoothly for me… But after 3 attempts (including 1 where I had to paint half the face all over again after a mishap with paint thinner) I’ve finally managed to get to stage where the eyes look correct and acceptable. Note, I didn’t say perfect. If I wanted a perfectly painted kit, then I’d never finish as there’s always something I would redo! So, for the penultimate stage of this little project, let’s look at eye painting in a little more detail!!
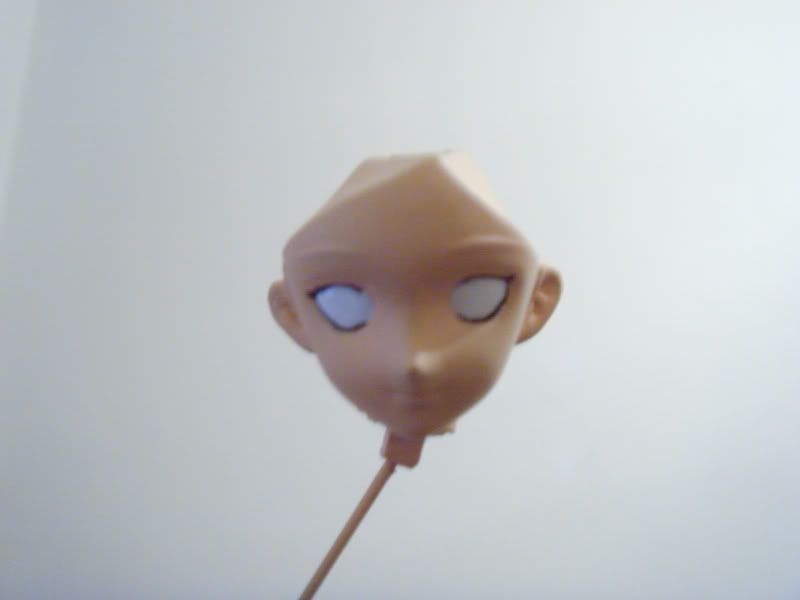
Initially, we started with a face which was painted completely over in flesh colour, as seen in the first pic along with hair parts.

The first thing we need to do is paint the whites of the eyes. This is pretty much the only time I use something other than acrylic paints on my kit. For this stage, I use enamel paint. The reason being that being that enamel paint doesn’t react with paint thinner, so if you make some big mistakes later on, you can use thinner to wipe out all the acrylic paint on top but the enamel will always remain so there’s one step less to worry about. Just be careful when wiping the paint off. You don’t want to overdo it and rub off some of the skin paint around the eyes by accident… orz

Continued after the jump
After that, The eyelashes are painted in. These are basically just a thin line of black painted on the top and bottom of the eyes. You have to be careful on how much paint you put on. You don’t want your kit looking all goth afterall, do you?
It can be rather hard for newbies to get the level right, so I suggest that first time painters should work to get the excess black onto the eyes at first, since you can just go over the excess black with the enamel white afterwards. That’s much easier than trying to paint over the excess black on the skin.
The next stage isn’t actually necessary but it can be quite useful to prevent problems later. Using a lead/mechanical pencil, I drew in the pupils and the outer boarders of the eyes to give a rough indication of where the colours will be.
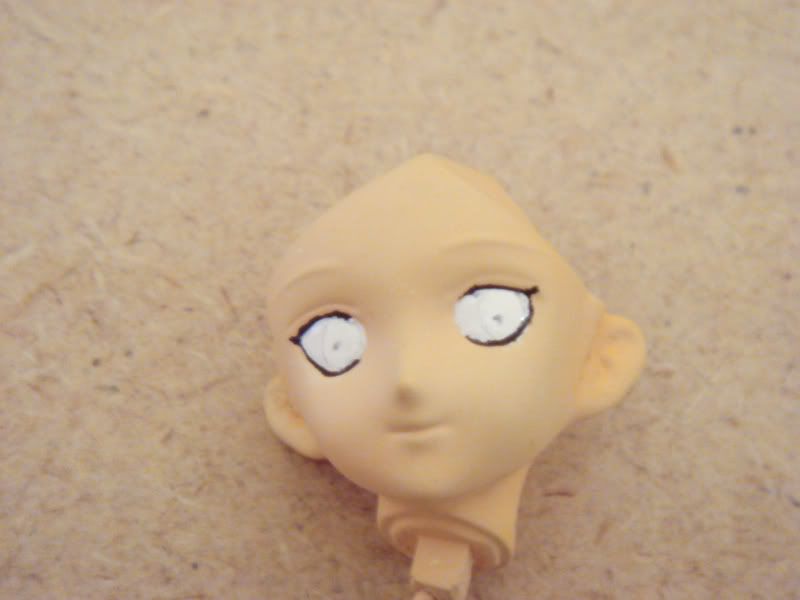
The idea is that the guidelines should, hopefully, assist in making the eyes symmetrical and prevent them from looking cross eyed. In theory…
After that, the outer parts of the eyes were painted in using a thin line of black. A similar technique to the eyelash painting was used and is something which will become easier as you do more of them.
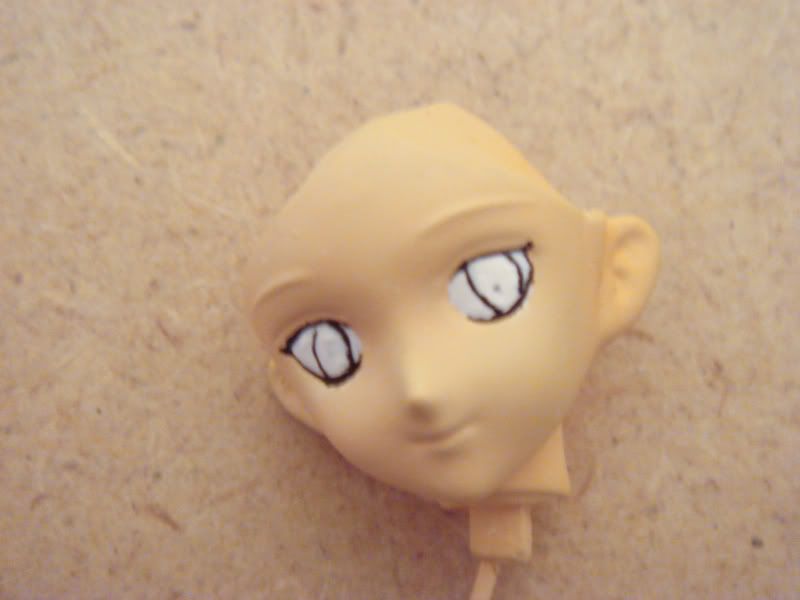
This is where I diverged a bit as I found quite an interesting tutorial for eye painting in Hobby maniacs vol 28. Instead of using my usual technique, I thought I would try the one shown in the mag. It’s not too dissimilar but they are far from identical.
Firstly, the whole inner eye was painted in the base colour. In this case, purple.

Next, the pupils were painted in using a small amount of black paint. It’s a little hard to see in this pic…

After that, the upper part of the eye above the pupil was also painted black and at an angle. This was to provide the necessary shadow on the eyes.
Finally, a lighter shade of purple was mixed (1:1 white and purple mix) and a thin line was painted on the purple area underneath the pupil. This is probably the trickiest part to do and I’m afraid there’s no easy way around it.

You can more clearly see the black painted in the upper area in the above pic.
Finally, a few dots of white paint were placed in certain areas to simulate the light shining off the eyes. Check out any anime character pic or figure, they all have them!
Generally speaking, I use a white spot in the upper right part of the eye and either another spot or a small line on the lower right. Of course, this depends on the character but the ares remain fairly constant throughout all my kits.

And that’s the end of the rather brief “how to paint the eyes” tutorial. All that’s left is to paint the eyebrows to match the hair and do some cleanup on certain parts before Mina is fully completed. Some of the more eagle eyed among you may have noticed the little bits of chipped paint in the last pic. That will also have to be repaired and there are some bits of paint seepage which will need looking into as well
That will all be done in the final cleanup step which I probably won’t do a post for. So you should all be able to see the completed Getsumento Heiki Mina very soon.
おたのしみに!


1 comment
Comments feed for this article
February 21, 2008 at 12:32 am
Project: C.C ver 1 (part 3) « Through the Looking Glass
[…] eyes followed almost the exact same steps as outlined in my previous Mina kit but without the lighter colour rim on the inside of the eye. Since C.C has […]